

Front End Design Tool Vb.net Pdf
This browser is no longer supported.
Upgrade to Microsoft Edge to take advantage of the latest features, security updates, and technical support.
- Feedback
- Edit
Tutorial: Get started with Visual Basic in Visual Studio
- 10 minutes to read
Thank you.
In this tutorial for Visual Basic (VB), you'll use Visual Studio to create and run a few different console apps and explore some features of the Visual Studio integrated development environment (IDE) while you do so.
Create a project
First, we'll create a Visual Basic application project. The project type comes with all the template files you'll need, before you've even added anything!
-
Open Visual Studio 2017.
-
From the top menu bar, choose File > New > Project.
-
In the New Project dialog box in the left pane, expand Visual Basic, and then choose .NET Core. In the middle pane, choose Console App (.NET Core). Then name the project WhatIsYourName.

Add a workload (optional)
If you don't see the Console App (.NET Core) project template, you can get it by adding the .NET Core cross-platform development workload. You can add this workload in one of the two following ways, depending on which Visual Studio 2017 updates are installed on your machine.
Option 1: Use the New Project dialog box
-
Click the Open Visual Studio Installer link in the left pane of the New Project dialog box.

-
The Visual Studio Installer launches. Choose the .NET Core cross-platform development workload, and then choose Modify.

Option 2: Use the Tools menu bar
-
Cancel out of the New Project dialog box and from the top menu bar, choose Tools > Get Tools and Features.
-
The Visual Studio Installer launches. Choose the .NET Core cross-platform development workload, and then choose Modify.
-
Open Visual Studio.
-
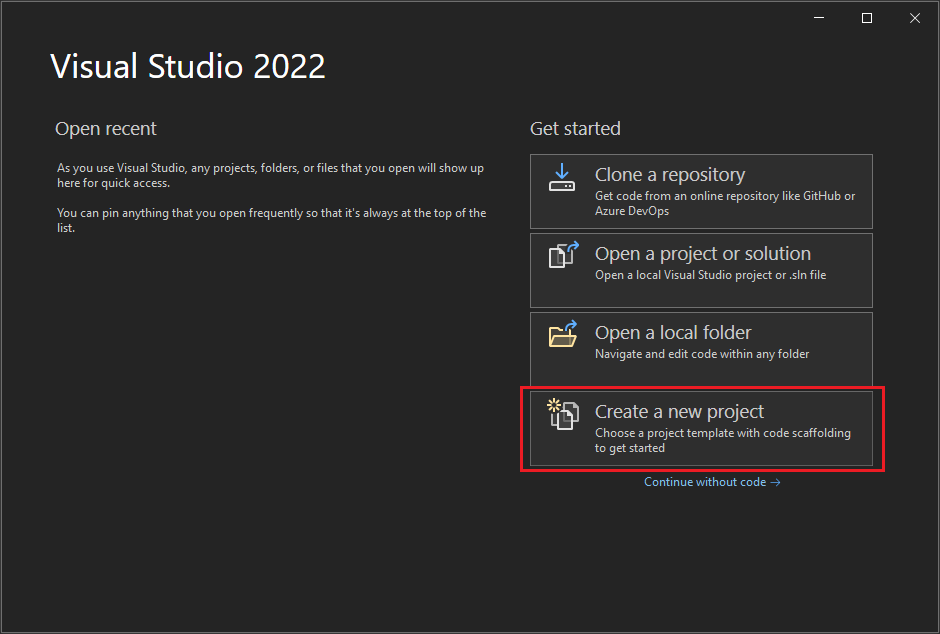
On the start window, choose Create a new project.

-
In the Create a new project window, choose Visual Basic from the Language list. Next, choose Windows from the Platform list and Console from the project types list.
After you apply the language, platform, and project type filters, choose the Console Application template, and then choose Next.

Note
If you do not see the Console Application template, you can install it from the Create a new project window. In the Not finding what you're looking for? message, choose the Install more tools and features link.

Then, in the Visual Studio Installer, choose the .NET Core cross-platform development workload.

After that, choose the Modify button in the Visual Studio Installer. You might be prompted to save your work; if so, do so. Next, choose Continue to install the workload. Then, return to step 2 in this "Create a project" procedure.
-
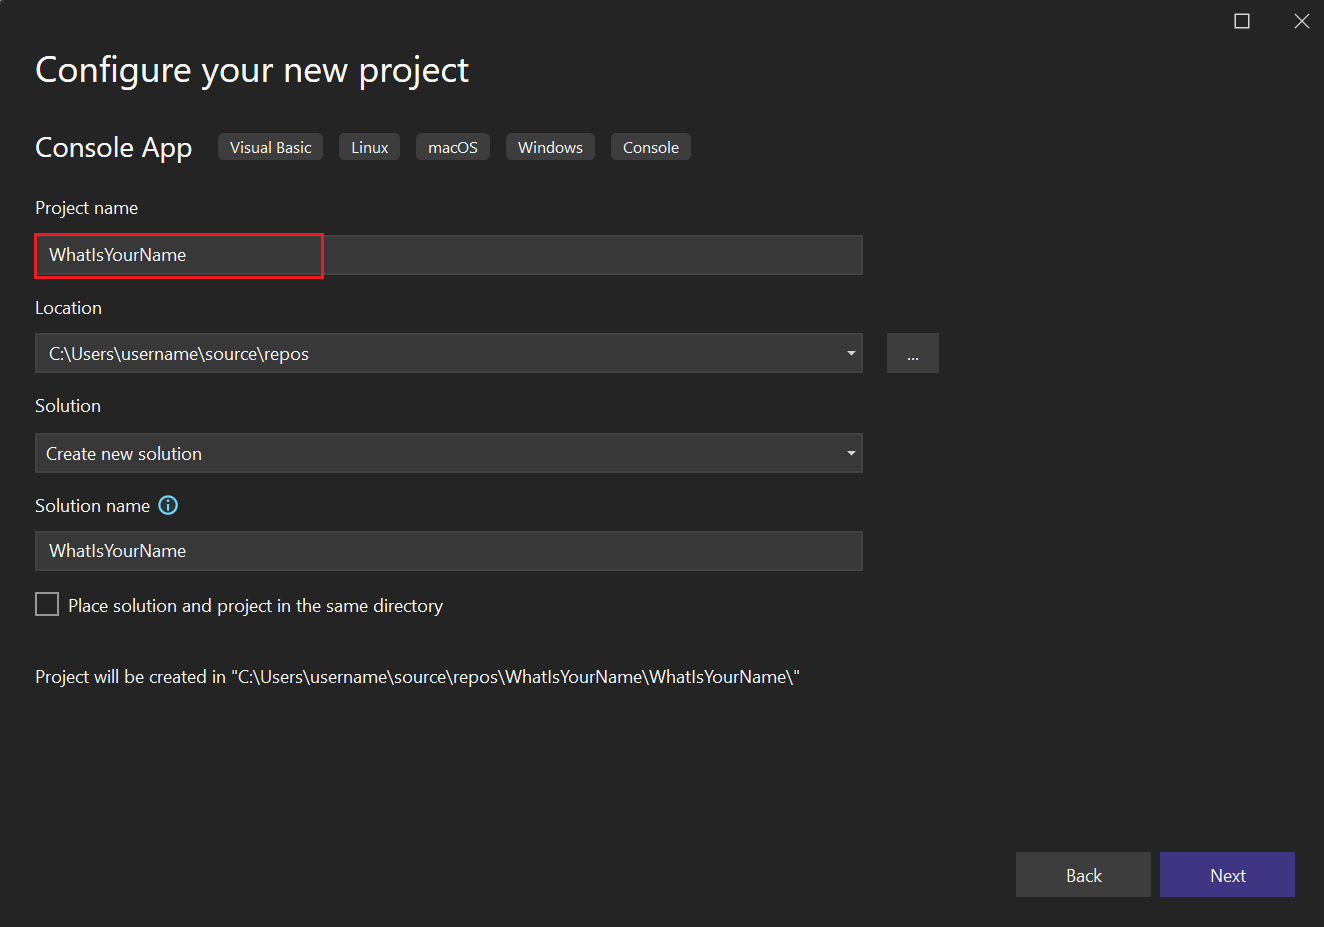
In the Configure your new project window, type or enter WhatIsYourName in the Project name box. Then, choose Next.

-
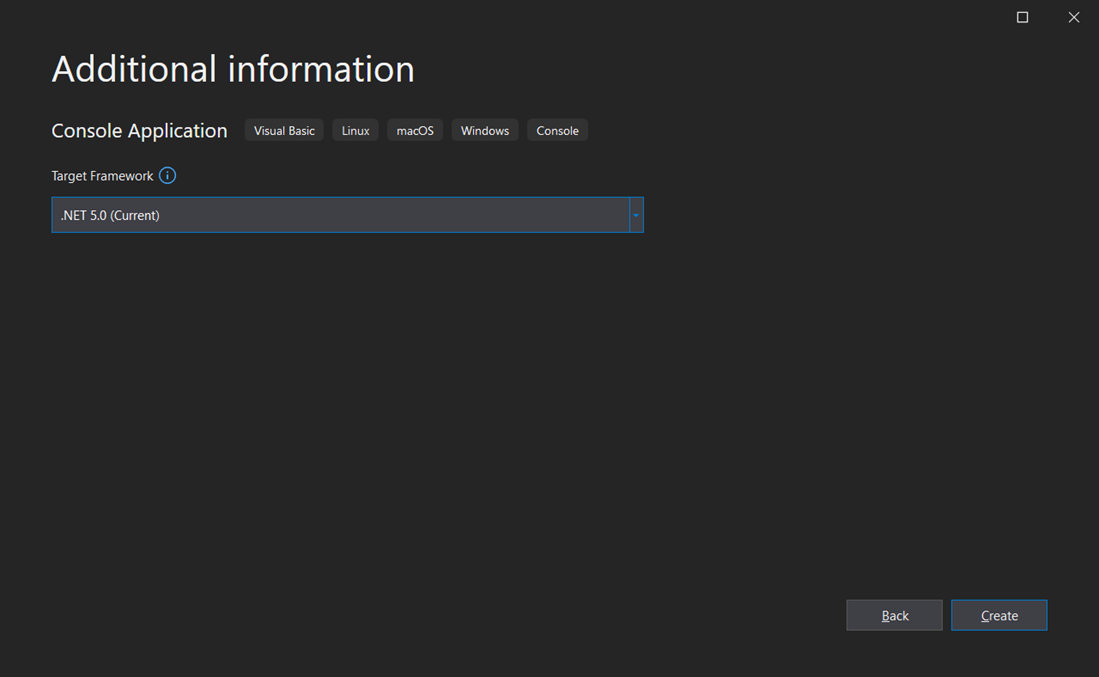
In the Additional information window, .NET Core 3.1 should already be selected for your target framework. If not, select .NET Core 3.1. Then, choose Create.
Visual Studio opens your new project.
-
Open Visual Studio.
-
On the start window, choose Create a new project.
-
In the Create a new project window, choose Visual Basic from the Language list. Next, choose Windows from the Platform list and Console from the Project types list.
After you apply the language, platform, and project type filters, choose the Console Application template, and then choose Next.

Note
If you do not see the Console Application template, you can install it from the Create a new project window. In the Not finding what you're looking for? message, choose the Install more tools and features link.

Then, in the Visual Studio Installer, choose the .NET desktop development workload.

After that, choose the Modify button in the Visual Studio Installer. You might be prompted to save your work; if so, do so. Next, choose Continue to install the workload. Then, return to step 2 in this "Create a project" procedure.
-
In the Configure your new project window, type or enter WhatIsYourName in the Project name box. Then, choose Next.
-
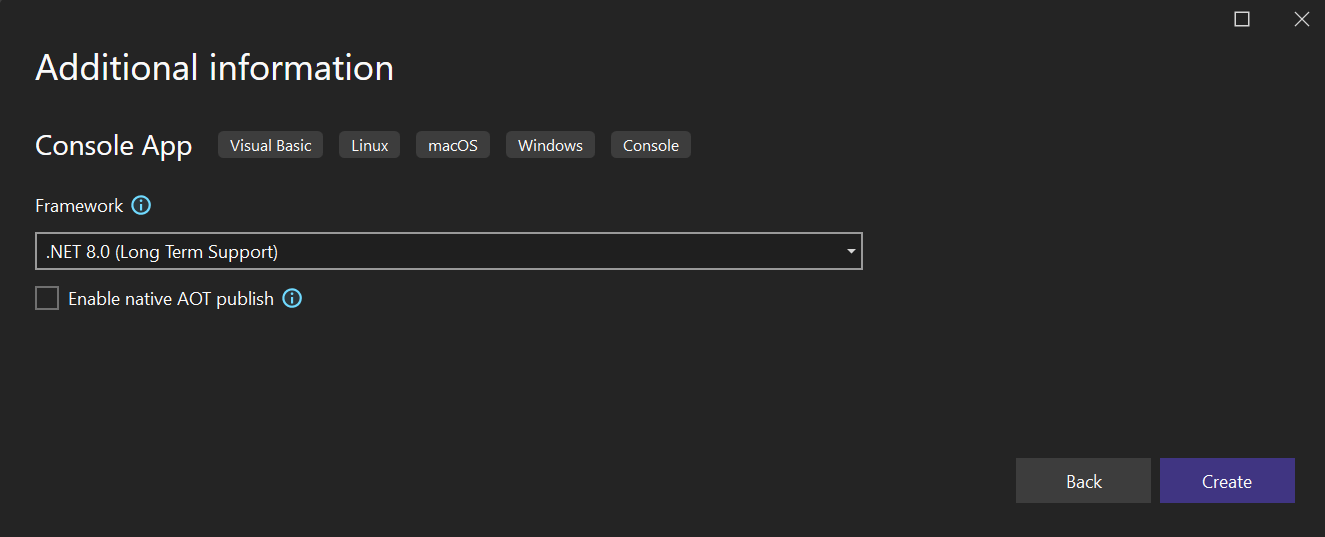
In the Additional information window, .NET 6.0 should already be selected for your target framework. If not, select .NET 6.0. Then, choose Create.
Visual Studio opens your new project.
Create a "What Is Your Name" application
Let's create an app that prompts you for your name and then displays it along with the date and time. Here's how:
-
If it is not already open, then open your WhatIsYourName project.
-
Enter the following Visual Basic code immediately after the opening bracket that follows the
Sub Main(args As String())line and before theEnd Subline:Console.WriteLine(vbCrLf + "What is your name? ") Dim name = Console.ReadLine() Dim currentDate = DateTime.Now Console.WriteLine($"{vbCrLf}Hello, {name}, on {currentDate:d} at {currentDate:t}") Console.Write(vbCrLf + "Press any key to exit... ") Console.ReadKey(True)This code replaces the existing WriteLine, Write, and ReadKey statements.

-
Use the green Start button, or press F5 to build and run your first app.
-
When the console window opens, enter your name. Your console window should look similar to the following screenshot:

-
Press any key to close the console window.
-
In the WhatIsYourName project, enter the following Visual Basic code immediately after the opening bracket that follows the
Sub Main(args As String())line and before theEnd Subline:Console.WriteLine(vbCrLf + "What is your name? ") Dim name = Console.ReadLine() Dim currentDate = DateTime.Now Console.WriteLine($"{vbCrLf}Hello, {name}, on {currentDate:d} at {currentDate:t}!") Console.Write(vbCrLf + "Press any key to exit... ") Console.ReadKey(True)This code replaces the existing WriteLine, Write, and ReadKey statements.
-
Use the green Start button, or press F5 to build and run your first app.
-
When the console window opens, enter your name. Your console window should look similar to the following screenshot:
-
Press any key to close the console window.
-
In the WhatIsYourName project, enter the following Visual Basic code in the Program.vb file immediately after the opening bracket that follows the
Sub Main(args As String())line and before theEnd Subline:Console.WriteLine(vbCrLf + "What is your name? ") Dim name = Console.ReadLine() Dim currentDate = DateTime.Now Console.WriteLine($"{vbCrLf}Hello, {name}, on {currentDate:d} at {currentDate:t}!") Console.Write(vbCrLf + "Press any key to exit... ") Console.ReadKey(True)This code replaces the existing WriteLine statement.

-
Use the green Start button, or press F5 to build and run your first app.
-
When the console window opens, enter your name. Your console window should look similar to the following screenshot:

-
Press any key to close the console window.
Create a "Calculate This" application
-
Open Visual Studio 2017, and then from the top menu bar, choose File > New > Project.
-
In the New Project dialog box in the left pane, expand Visual Basic, and then choose .NET Core. In the middle pane, choose Console App (.NET Core). Then name the file CalculateThis.
-
Enter the following code between the
Module Programline and theEnd Moduleline:Public num1 As Integer Public num2 As Integer Public answer As Integer Sub Main() Console.WriteLine("Type a number and press Enter") num1 = Console.ReadLine() Console.WriteLine("Type another number to add to it and press Enter") num2 = Console.ReadLine() answer = num1 + num2 Console.WriteLine("The answer is " & answer) Console.ReadLine() End SubYour code window should look like the following screenshot:

-
Click CalculateThis to run your program. Your console window should look similar to the following screenshot:

-
On the start window, choose Create a new project.
-
In the Create a new project window, choose Visual Basic from the Language list. Next, choose Windows from the Platform list and Console from the project types list.
-
After you apply the language, platform, and project type filters, choose the Console Application template, and then choose Next.
Then, in the Configure your new project window, type or enter CalculateThis in the Project name box. Then, choose Next.
-
In the Additional information window, .NET Core 3.1 should already be selected for your target framework. If not, select .NET Core 3.1. Then, choose Create.
-
Enter the following code between the
Module Programline andEnd Moduleline:Public num1 As Integer Public num2 As Integer Public answer As Integer Sub Main() Console.WriteLine("Type a number and press Enter") num1 = Console.ReadLine() Console.WriteLine("Type another number to add to it and press Enter") num2 = Console.ReadLine() answer = num1 + num2 Console.WriteLine("The answer is " & answer) Console.ReadLine() End SubYour code window should look like the following screenshot:
-
Click CalculateThis to run your program. Your console window should look similar to the following screenshot:
-
On the start window, choose Create a new project.
-
In the Create a new project window, choose Visual Basic from the Language list. Next, choose Windows from the Platform list and Console from the Project types list.
-
After you apply the language, platform, and project type filters, choose the Console Application template, and then choose Next.
Then, in the Configure your new project window, type or enter CalculateThis in the Project name box. Then, choose Next.
-
In the Additional information window, .NET 6.0 should already be selected for your target framework. If not, select .NET 6.0. Then, choose Create.
-
In Program.vb, enter the following code between the
Module Programline andEnd Moduleline:Public num1 As Integer Public num2 As Integer Public answer As Integer Sub Main() Console.WriteLine("Type a number and press Enter") num1 = Console.ReadLine() Console.WriteLine("Type another number to add to it and press Enter") num2 = Console.ReadLine() answer = num1 + num2 Console.WriteLine("The answer is " & answer) Console.ReadLine() End SubYour code window should look like the following screenshot:

-
Select the green Start button next to CalculateThis to run your program. Your console window should look similar to the following screenshot:

Add Git source control
Now that you've created an app, you might want to add it to a Git repository. We've got you covered. Visual Studio makes that process easy with Git tools you can use directly from the IDE.
Tip
Git is the most widely used modern version control system, so whether you're a professional developer or you're learning how to code, Git can be very useful. If you're new to Git, the https://git-scm.com/ website is a good place to start. There, you can find cheat sheets, a popular online book, and Git Basics videos.
To associate your code with Git, you start by creating a new Git repository where your code is located. Here's how:
-
In the status bar at the bottom-right corner of Visual Studio, select Add to Source Control, and then select Git.

-
In the Create a Git repository dialog box, sign in to GitHub.

The repository name auto-populates based on your folder location. By default, your new repository is private, which means you're the only one who can access it.
Tip
Whether your repository is public or private, it's best to have a remote backup of your code stored securely on GitHub. Even if you aren't working with a team, a remote repository makes your code available to you from any computer.
-
Select Create and Push.
After you create your repository, you see status details in the status bar.

The first icon with the arrows shows how many outgoing/incoming commits are in your current branch. You can use this icon to pull any incoming commits or push any outgoing commits. You can also choose to view these commits first. To do so, select the icon, and then select View Outgoing/Incoming.
The second icon with the pencil shows the number of uncommitted changes to your code. You can select this icon to view those changes in the Git Changes window.
To learn more about how to use Git with your app, see the Visual Studio version control documentation.
Quick answers FAQ
Here's a quick FAQ to highlight some key concepts.
What is Visual Basic?
Visual Basic is a type-safe programming language that's designed to be easy to learn. It is derived from BASIC, which means "Beginner's All-purpose Symbolic Instruction Code".
What is Visual Studio?
Visual Studio is an integrated development suite of productivity tools for developers. Think of it as a program you can use to create programs and applications.
What is a console app?
A console app takes input and displays output in a command-line window, also known as a console.
What is .NET Core?
.NET Core is the evolutionary next step of the .NET Framework. Where the .NET Framework allowed you to share code across programming languages, .NET Core adds the ability to share code across platforms. Even better, it's open source. (Both the .NET Framework and .NET Core include libraries of prebuilt functionality and a common language runtime (CLR), which acts as a virtual machine in which to run your code.)
Next steps
Congratulations on completing this tutorial! To learn even more, see the following tutorial.
See also
- Visual Basic language walkthroughs
- Visual Basic language reference
- IntelliSense for Visual Basic code files
Feedback
Front End Design Tool Vb.net Pdf
Source: https://docs.microsoft.com/en-us/visualstudio/get-started/visual-basic/tutorial-console
Posted by: reimereaketury.blogspot.com
0 Response to "Front End Design Tool Vb.net Pdf"
Post a Comment